![]() If you ever worked in a team you know how messy certificates and provisioning profiles can get. Lately Xcode mitigates most of these age-old problems, but there’s one little tool that brings a whole different concept to managing certificates and provisioning profiles. In this article we’ll learn how to manage code signing with match and use it to distribute the provisioning profiles and certificates within our team.
If you ever worked in a team you know how messy certificates and provisioning profiles can get. Lately Xcode mitigates most of these age-old problems, but there’s one little tool that brings a whole different concept to managing certificates and provisioning profiles. In this article we’ll learn how to manage code signing with match and use it to distribute the provisioning profiles and certificates within our team.
GIT Based Approach
There is a great tool called ‘fastlane’ and ‘match’ is one of the tools that comes bundled with it. What ‘match’ is responsible for is signing the apps. fastlane was created to make distributing your apps as simple as possible, match follows the same philosophy.
The way match handles distributing certificates between your team members is ingenious in its simplicity. It just uses git to do it. Don’t get me wrong, there’s a lot match can do for you, but this is the basic principle. They have a great guide on code signing, it’s worth checking out.
If you use Xcode to manage signing, every member of your team will have to have an iTunes Connect account. With match this is no longer a requirement. match can simply checkout the shared certificates and provisioning profiles and use them 🙂
match works best when used on a CI/CD machine. If you ever had to maintain certificates on your CI/CD machine you will appreciate this little tool. That being said, this doesn’t mean you can’t use it within your development team. Let’s see how to set it up…
Setup Once
Check if you have the latest command line tools installed:
Next, install fastlane in order to use match, so go ahead open your terminal and type:
When you’re finished installing fastlane you will need a private git repo. match will use this repo to store your certificates and provisioning profiles, so make sure the repo is private. Once you have everything set, go to the project folder that you want to manage with match and initialise it:
You will need to provide the url to the private git repo that you created in the step above:

Since this is your first time running the init for this environment you will be asked a couple of questions. Mainly to log in to iTunes Connect and select your development team:
![]()
After running the init command you should generate the certificates and profiles. For development certificates and profiles you would type this in the terminal:
Once match finishes generating your profiles and certificates it will push them to the git repo:
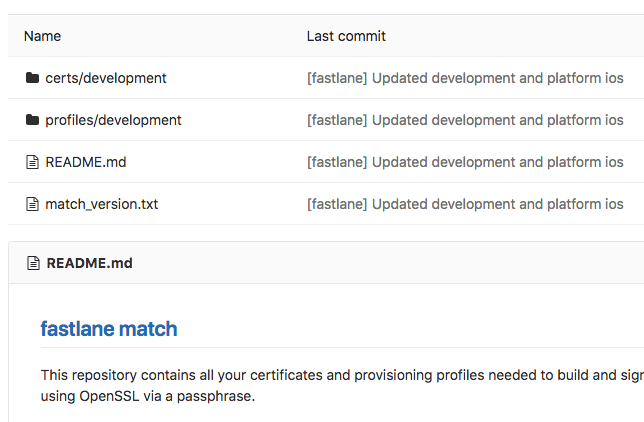
Project Changes
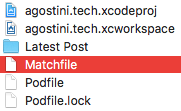
After running these commands you will have some project changes to commit as well. match will create a small file in your project that will have the repo url and some additional parameters. You can use this file to customise match.
Since match will handle certificates and signing from now on you will have to disable automatic signing in Xcode and select manual certificates:
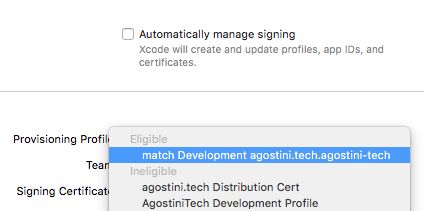
These are the steps that you will have to do once per project. You can commit these changes now. When your team members pull the code from the repo they will only have to run one command, and they don’t need to have an iTunes Connect account.
Using It
When you’re setting up a new mac or checking out a fresh project (or right after doing the steps above) your team members (or CI machine) will have to run one command to have their profiles and certificates in sync:
If you run this command with the ‘readonly’ parameter then you won’t have to provide the iTunes Connect credentials. This is perfect for development because you can’t accidentally update the profiles (and invalidate the old ones).
That’s it for the quick intro to this great little tool.
Conclusion
We scratched the surface here with match, it can do a lot more for you. But this will be enough to get you started. Some of the more advanced features are handling multiple targets and adding new devices to profiles. Even if you don’t have a CI/CD pipeline set for your team, I think match is a great tool to use because it simplifies something that is needlessly complicated. If you worked in a larger team you know that adding new members to the organisation is boring and tedious. And you always have to keep an eye on access management (people come and go). match offers you a simple solution, share the profiles and certificates. And if the team members run it in the readonly mode they don’t even have to have an account on iTunes Connect.
So go ahead and give it a go. It takes minutes to set up and it will save you hours in the long run 🙂 I hope you found this article useful and that you learned something new today 🙂
I had a plan of writing an article on setting up a CI/CD pipeline, but I realised that would be a massive article. I’m trying to keep most articles between 1000 and 1500 words, so I’ll be splitting that big topic into a couple of smaller, easily digestible articles. This article is the first in the series. In the next article we’ll cover how to automatically create screenshots for your app when you’re preparing it for submission to the AppStore.
Stay tuned and as usual… Have a nice day 🙂
~D;
Pingback: Automatic Screenshots With fastlane snapshot | agostini.tech
Pingback: Using fastlane | agostini.tech