Using SiriKit
Dejan Agostini

With iOS 10 we got access to Siri. We got limited access, but still, we can do some cool things with it. In this post, I'll go over the details on how to setup Siri in your app and one example use.
 On the next screen, you'll need to set some basic parameters, like the product name and the language. I called mine 'SiriTest' and the language is swift, of course :) I won't be using the UI extension, so I had it ticked off:
 Once you click on the 'Finish' button Xcode will detect that you created a new scheme for your new target and it will ask you if you want to activate it, go ahead and select 'Activate':
 Now you got a new folder in your project explorer with your intent:
 You have your Siri extension, but it's not ready for use. We have to set a couple more things in our project in order for us to use it.
 This will create an entitlements file for your project. Open your Info.plist file and add a Siri usage description:
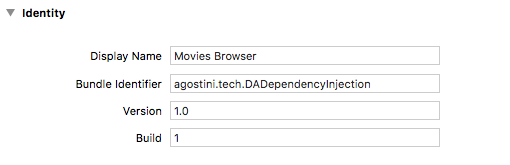
 One more thing I changed for my project was the display name. Siri will search for your app based on the display name, so I changed it to 'Movies Browser' it kinda sounded better than 'DADependencyInjection':
 Now we need to ask the user for permission in order to use Siri, it's just one method call that you can add to your initial view controller:
About SiriKit
Not all apps can use SiriKit. At the moment your app has to fall into one of seven predefined categories: messaging, ride booking, photo search, payments, workouts, VoIP calling and climate/radio (CarKit only). If your app doesn't fall into these categories... tough luck. I wanted to integrate SiriKit into an existing project, just to see how it would look like. The closest one that matched was the 'DADependencyInjection' project (I was using the photos search category for it). Without further ado, let's jump in.Create Extension
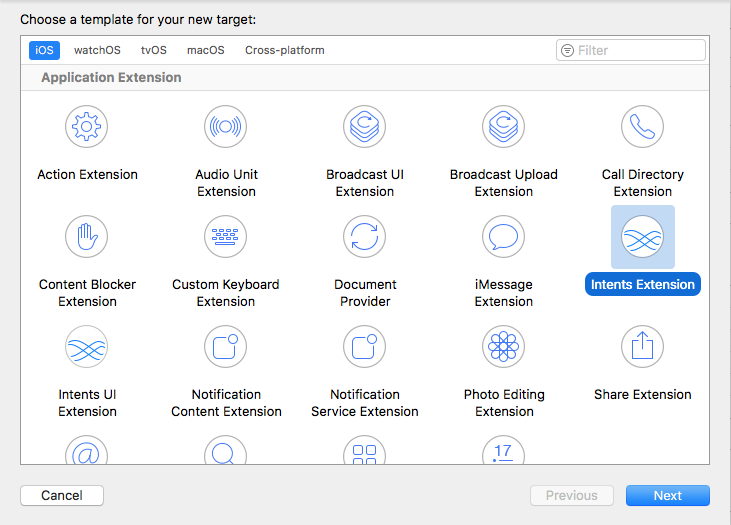
You integrate Siri in your app by creating an extension, just like any other extension. You can create two extensions Intents Extension and Intents UI Extension. It's worth pointing out that not all Intents can have a UI Extension. For example, payments intent can have a UI extension while photo search intent can't. So select your project and add a new target, from the list select 'Intents Extension':
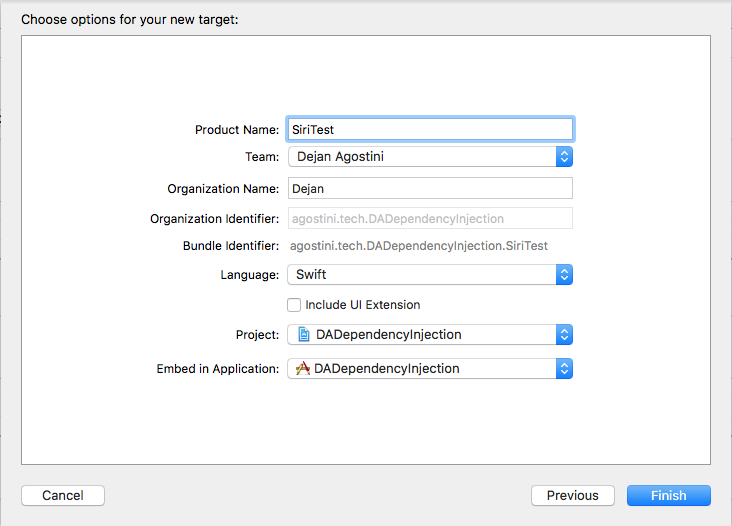
On the next screen, you'll need to set some basic parameters, like the product name and the language. I called mine 'SiriTest' and the language is swift, of course :) I won't be using the UI extension, so I had it ticked off:
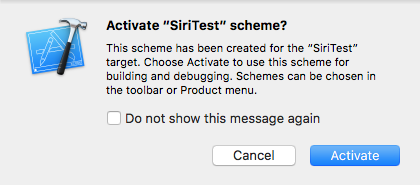
Once you click on the 'Finish' button Xcode will detect that you created a new scheme for your new target and it will ask you if you want to activate it, go ahead and select 'Activate':
Now you got a new folder in your project explorer with your intent:
You have your Siri extension, but it's not ready for use. We have to set a couple more things in our project in order for us to use it.
Project Setup
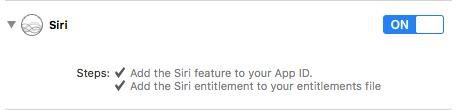
Go to your project main target, select the capabilities tab and enable Siri:
This will create an entitlements file for your project. Open your Info.plist file and add a Siri usage description:
One more thing I changed for my project was the display name. Siri will search for your app based on the display name, so I changed it to 'Movies Browser' it kinda sounded better than 'DADependencyInjection':
Now we need to ask the user for permission in order to use Siri, it's just one method call that you can add to your initial view controller:
private func requestSiriAuthorization() {
        INPreferences.requestSiriAuthorization { (status) in
            switch status {
            case .authorized:
                print("authorized")
            case .denied:
                print("denied")
            case .notDetermined:
                print("notDetermined")
            case .restricted:
                print("restricted")
            }
        }
    }
When you build and run your app the user is asked to grant permission to use Siri:
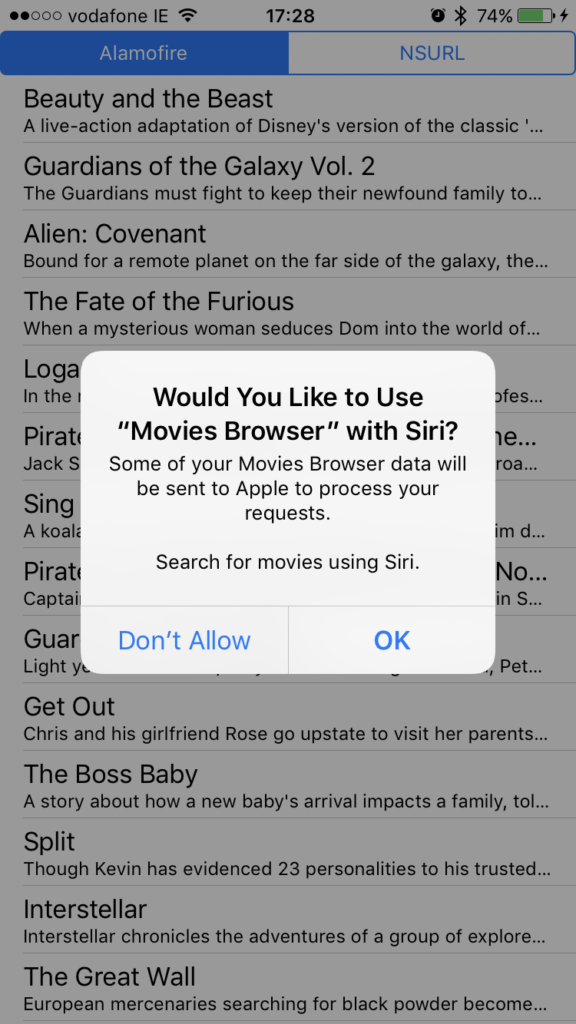 You can see the Siri usage string that we added to Info.plist. If you don't add this string to your Info.plist you won't see this alert, meaning you won't be able to use Siri. When you tap on OK you'll be ready to use Siri in your app.
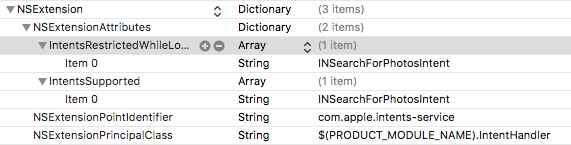 I've added INSearchForPhotosIntent in the 'IntentsSupported' and 'IntentsRestrictedWhileLocked'. This will make Siri available for our app when the phone is locked.
A class got created for us when we added the extension 'IntentHandler.swift' it contains an example of a messaging intent, we'll just change the whole thing to use search for photos intent. Delete all the protocol conformations and add a new one, INSearchForPhotosIntentHandling and implement the required function:
I've added INSearchForPhotosIntent in the 'IntentsSupported' and 'IntentsRestrictedWhileLocked'. This will make Siri available for our app when the phone is locked.
A class got created for us when we added the extension 'IntentHandler.swift' it contains an example of a messaging intent, we'll just change the whole thing to use search for photos intent. Delete all the protocol conformations and add a new one, INSearchForPhotosIntentHandling and implement the required function:
You can see the Siri usage string that we added to Info.plist. If you don't add this string to your Info.plist you won't see this alert, meaning you won't be able to use Siri. When you tap on OK you'll be ready to use Siri in your app.
Extension Setup
We are going to use 'search photos intention', it's the only one that even remotely makes sense for this app, so we'll need to include this key in the Info.plist of the extension:
I've added INSearchForPhotosIntent in the 'IntentsSupported' and 'IntentsRestrictedWhileLocked'. This will make Siri available for our app when the phone is locked.
A class got created for us when we added the extension 'IntentHandler.swift' it contains an example of a messaging intent, we'll just change the whole thing to use search for photos intent. Delete all the protocol conformations and add a new one, INSearchForPhotosIntentHandling and implement the required function:
class IntentHandler: INExtension, INSearchForPhotosIntentHandling {

    var dataProvider: ListDisplayableDataProvider = MoviesManager()

    override func handler(for intent: INIntent) -> Any {
        return self
    }

    func handle(searchForPhotos intent: INSearchForPhotosIntent, completion: @escaping (INSearchForPhotosIntentResponse) -> Void) {
        guard let searchTerm = intent.searchTerms?.first else {
            let response = INSearchForPhotosIntentResponse(code: .failure, userActivity: nil)
            completion(response)
            return
        }

        dataProvider.searchListItems(searchTerm: searchTerm) { (items) in
            let userActivity = NSUserActivity(activityType: NSStringFromClass(INSearchForPhotosIntent.self))
            if let movie = items.first {
                userActivity.userInfo = [SiriConstants.ItemTitle.rawValue: movie.listItemTitle, SiriConstants.ItemDescription.rawValue: movie.listItemSubtitle ?? ""]
                userActivity.title = "Search Results"
                userActivity.isEligibleForHandoff = true
                userActivity.becomeCurrent()
            }

            let response = INSearchForPhotosIntentResponse(code: .continueInApp, userActivity: userActivity)

            completion(response)
        }
    }
}
When our handle gets called we can get an array of search terms. In the example above we'll be using the first search term to query our data source for a movie. When we find the movie we'll add its title and description to the userInfo dictionary. We have to set the 'isEligibleForHandoff' to true in order to transfer this object to our AppDelegate, this way we can display our custom UI.
We'll create an Intent Response object with the .continueInApp code and our User Activity, this will tell Siri to open our app and pass the User Activity to the AppDelegate.
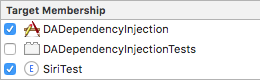
You probably noticed that we're using the MoviesManager in the extension. For this class to become accessible in the extension you will have to add all the related files to the extension target. In my example that would mean all the files in the 'Core' folder the 'Libraries' folder and the 'SiriConstants.swift' file. The easiest way to do this is to select all the files you need and add them to the target all at once:
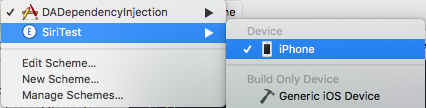
 Let's build and run our extension. From the list of schemes select the 'SiriTest' scheme and select your iPhone:
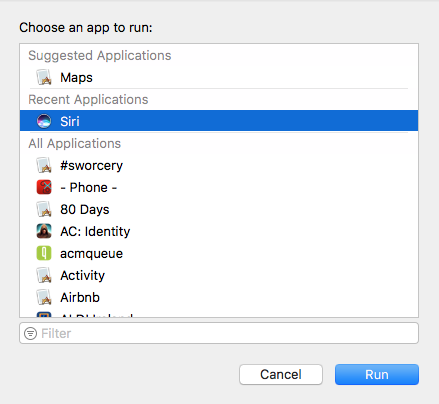
 Xcode will ask you which app to start, select 'Siri' from the list:
 Now you should see your standard 'Siri' screen waiting for your input, go ahead and ask her something like 'Search for photos of alien using Movies Browser:
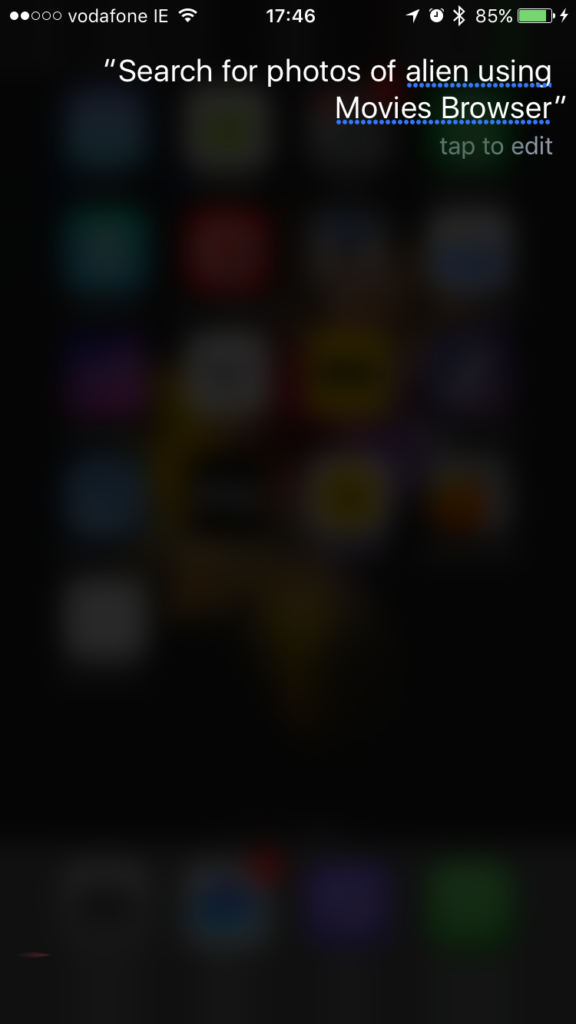 Siri will deconstruct this sentence into three parts: search for photos intent (Search for photos...), search terms ('alien', an array of one item in our case) and the app ('using Movies Browser'). In the code example above we're fetching the search term and using it to query the list of movies.
Cool, we have Siri working for us and we're executing code in the background. Let's transfer some data back to our main app.
Siri will deconstruct this sentence into three parts: search for photos intent (Search for photos...), search terms ('alien', an array of one item in our case) and the app ('using Movies Browser'). In the code example above we're fetching the search term and using it to query the list of movies.
Cool, we have Siri working for us and we're executing code in the background. Let's transfer some data back to our main app.
Let's build and run our extension. From the list of schemes select the 'SiriTest' scheme and select your iPhone:
Xcode will ask you which app to start, select 'Siri' from the list:
Now you should see your standard 'Siri' screen waiting for your input, go ahead and ask her something like 'Search for photos of alien using Movies Browser:
Siri will deconstruct this sentence into three parts: search for photos intent (Search for photos...), search terms ('alien', an array of one item in our case) and the app ('using Movies Browser'). In the code example above we're fetching the search term and using it to query the list of movies.
Cool, we have Siri working for us and we're executing code in the background. Let's transfer some data back to our main app.
Main App
We have our extension setup to transfer data to our main app. In the AppDelegate we have to implement a method:func application(_ application: UIApplication, continue userActivity: NSUserActivity, restorationHandler: @escaping ([Any]?) -> Void) -> Bool {
if let title = userActivity.userInfo?[SiriConstants.ItemTitle.rawValue] as? String,
let desc = userActivity.userInfo?[SiriConstants.ItemDescription.rawValue] as? String {
if let detailsVC = self.window?.rootViewController?.storyboard?.instantiateViewController(withIdentifier: "DetailsVC") as? DetailsViewController {
detailsVC.itemTitle = title
detailsVC.itemDescription = desc
self.window?.rootViewController?.present(detailsVC, animated: true, completion: nil)
}
}
return true
}
We're fetching the movie title and description from the dictionary that we passed from the extension. And we're going to use this to present a modal screen that will display this data, nothing fancy, we just want to see it working. If you build and run and ask Siri the same question as before, a modal should pop up like so:
 There you go, we have Siri doing stuff for us in the app :)
There you go, we have Siri doing stuff for us in the app :)