Using fastlane
Dejan Agostini
fastlane is a very popular automation tool for developers. It can do so much for you: manage code signing, create screenshots, publish betas, upload release builds to iTunes Connect, manage your app's metadata... Over the last couple of weeks we've talked about using match for code signing and using snapshot to automatically generate screenshots. This week we'll talk about using fastlane to upload your app to iTunes Connect for processing.
 I'll assume you know how to do that :)
What's The Plan
By the end of this article we'll do all of these steps automatically with only one terminal command:- generate screenshots for our app
- update the metadata
- increase the version of the app
- create a tag with the version
- commit it to the repo
- upload the app to iTunes Connect for processing
- send a slack message
I'll assume you know how to do that :)
Setting Up fastlane
If you've been following the tutorials these last few weeks, chances are you already have fastlane set up, just in case you haven't been following, install the latest command line tools:xcode-select --install
After that, install fastlane:
sudo gem install fastlane -NV
And add this to your .bash_profile:
export LC_ALL=en_US.UTF-8
export LANG=en_US.UTF-8
That's all the setup you need. On to the project...
Project Setup
Go to your project directory, open up the terminal and initialise fastlane:fastlane init
fastlane will ask you a couple of simple questions, just follow the wizard. We'll be automating the app store distribution, so select that option when you see these options:
 At one point, fastlane will ask you if you want it to manage your app's metadata, select yes:
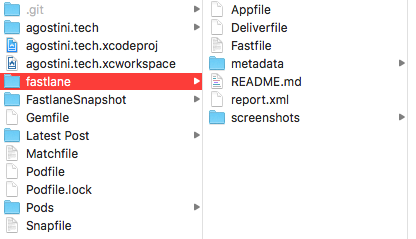
 When you're finished with these steps you'll find a new directory in your project directory:
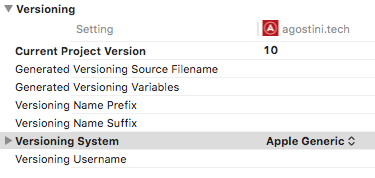
 You will also need to change the versioning system and the initial project version. Select your target, go to 'Build Settings' and find the 'Versioning' section. Make sure you select 'Apple Generic' and set your current project version:
 That's it for the project setup. Let's check out some of the files fastlane created for us.
 All the metadata is conveniently organised in '.txt' files. If you wish to change any of it for your next release you can simply edit these files and commit your changes to git. You should at least update the 'release_notes.txt' file for your next release. If you have your metadata in other locales, they will appear in their respective folders (just like 'en-US' is in its folder above).
At one point, fastlane will ask you if you want it to manage your app's metadata, select yes:
Xcode Project
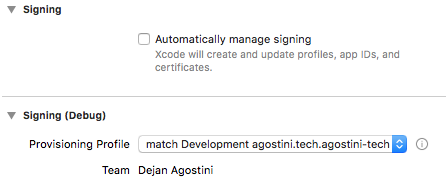
Open up your project in Xcode and make sure that Xcode is not automatically managing signing:
You will also need to change the versioning system and the initial project version. Select your target, go to 'Build Settings' and find the 'Versioning' section. Make sure you select 'Apple Generic' and set your current project version:
That's it for the project setup. Let's check out some of the files fastlane created for us.
App Metadata
Since we've asked fastlane to manage our app's metadata we can see a folder with our existing metadata:
All the metadata is conveniently organised in '.txt' files. If you wish to change any of it for your next release you can simply edit these files and commit your changes to git. You should at least update the 'release_notes.txt' file for your next release. If you have your metadata in other locales, they will appear in their respective folders (just like 'en-US' is in its folder above).
Fastfile
One of the files fastlane created for us is called 'Fastfile' this is the main setup file that you'll use. We'll create one lane in this file called 'release'. This is how my 'Fastfile' looks like:# Uncomment the line if you want fastlane to automatically update itself
# update_fastlane
default_platform(:ios)
platform :ios do
desc "Push a new release build to the App Store"
lane :release do
sync_code_signing(type: "appstore")
# Archive
build = increment_build_number(xcodeproj: "agostini.tech.xcodeproj")
build_app(workspace: "agostini.tech.xcworkspace", scheme: "agostini.tech")
# Screenshots
capture_screenshots
# AppStore
upload_to_app_store(
force: true
)
# Bump the build number
version = get_version_number
commit_version_bump(
xcodeproj:"agostini.tech.xcodeproj",
message: "[ci-skip] v#{version} (#{build})",
force: true
)
# Tag
add_git_tag(
tag: "v#{version}"
)
# Push the tag
push_to_git_remote(
remote: "origin",
local_branch: "master",
remote_branch: "master",
force: true,
tags: true
)
# Notify on slack
slack(
message: "App successfully released!",
fail_on_error: false
)
end
end
Let's go over it from the top. We named our lane 'release', this is what we'll type in the terminal after 'fastlane' you can call yours anything you like. We sync our distribution provisioning profiles and certificates. This is done using match. After which we increment the build number and build the app. We're saving the build number from this step, we'll use it later.
When the build completes we'll create the screenshots. Screenshots are created using snapshot, you can read about it in one of the previous articles. In the next step, we're actually uploading the app to the app store.
After the upload, we're getting the version number of the app. We'll use the version number and the build number to create a commit message and we'll commit the version bump. All that's left is to tag the repo and push all our local commits to remote.
We're sending a slack message in the last step, this step is optional, but I find it very useful. We're all set to run.
Watch It Run
Open up the terminal, navigate to your project directory and type:fastlane release
If you're sending a notification to your slack channel, make sure you have your webhook url ready. If you're not using it then there shouldn't be any interactive steps for you after the above terminal command.
Depending on your project size, this step can last a couple of minutes. It's time to get some tea/coffee :)
After a few minutes you will be greeted with a success message from fastlane:
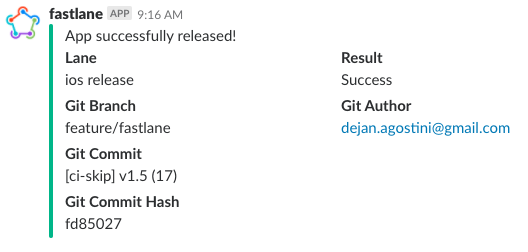
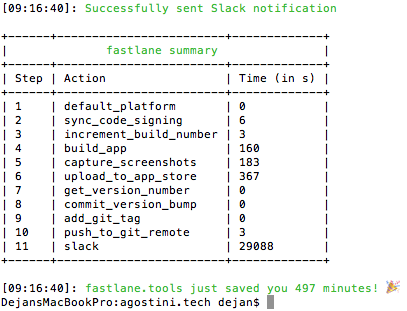 If you have slack integration enabled, you will also see the message:
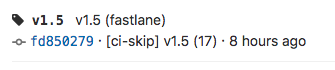
 You should see the tag in your git repo as well:
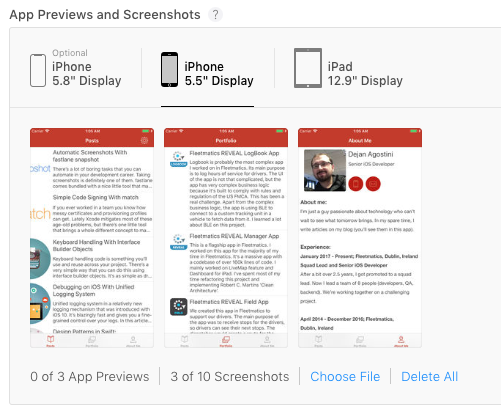
 If you go to the iTunes Connect and check your new app version, you should see the metadata updated, in our case the screenshots:
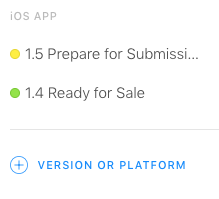
 Check out the activities tab, your release build should be there ready for you:
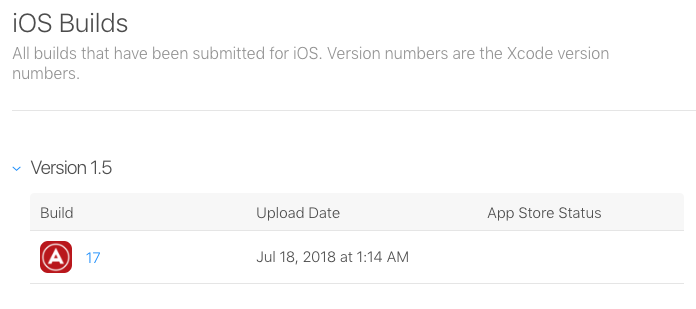 As you already know, processing builds takes some time. If you use the 'Connect' app from Apple you'll receive a push when your build has finished processing. When you do, you just add the build to your new app version and submit your app for review.
This last step is not automated, you'll have to do it yourself.
As you already know, processing builds takes some time. If you use the 'Connect' app from Apple you'll receive a push when your build has finished processing. When you do, you just add the build to your new app version and submit your app for review.
This last step is not automated, you'll have to do it yourself.
If you have slack integration enabled, you will also see the message:
You should see the tag in your git repo as well:
If you go to the iTunes Connect and check your new app version, you should see the metadata updated, in our case the screenshots:
Check out the activities tab, your release build should be there ready for you:
As you already know, processing builds takes some time. If you use the 'Connect' app from Apple you'll receive a push when your build has finished processing. When you do, you just add the build to your new app version and submit your app for review.
This last step is not automated, you'll have to do it yourself.