Using AVSpeechSynthesizer
Dejan Agostini

AVSpeechSynthesizer is a part of the AVFoundation framework that's used to convert text to spoken audio. It's a great tool for converting text to speech and it works surprisingly well. In this short article we'll be using AVSpeechSynthesizer on a small demo app.
 We'll have some private properties that we'll use later:
Text to Speech
A long, long time ago I wrote an article on how to use offline speech recognition. Part of that article covers the text to speech capability of the OpenEars library. If you need the speech recognition this is a great option. But if you only need the text to speech capability then AVSpeechSynthesizer is a better option. It's very simple to use and you don't have to install a third-party library to use it. AVSpeechSynthesizer works completely offline, that's an added bonus. After initialising the class, all you have to do is pass it an instance of AVSpeechUtterance and it will read out the text. In most cases it will be enough for you to simply initialise the AVSpeechUtterance instance with the default parameters, since it works so well. You can have some fun and fine tune the utterance using custom values for the pitch and the rate of speech. But you probably don't want that high-pitched helium voice in your production app, right :) Let's jump into a quick example and see it at work...The Example
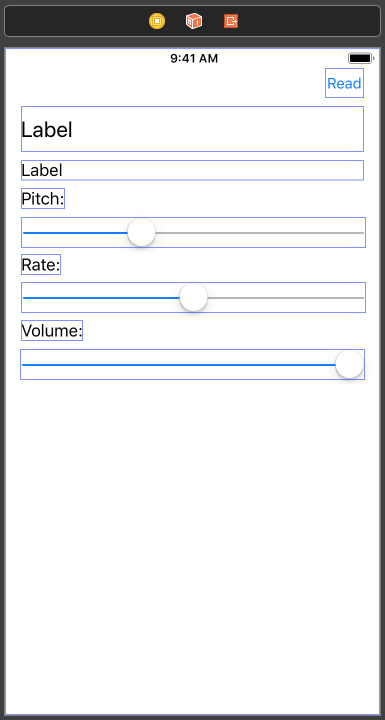
We'll use an existing app we wrote a while back when we talked about dependency injection. You can check out the branch here. It's a simple app that connects to 'themoviedb' and downloads a list of popular movies. You can then display some details about a certain movie. Our app will speak out the title of the selected movie and it will read out the short description if the user taps the button. The app will also have some sliders so we can control the pitch, rate and volume. The interface will be pretty simple:
We'll have some private properties that we'll use later:
private let speechSynthesizer = AVSpeechSynthesizer()
private var pitch: Float = 1.0
private var rate = AVSpeechUtteranceDefaultSpeechRate
private var volume: Float = 1.0
At the top is our synthesizer, we initialise it immediately. A thing to note is that the 'rate' property has a lower and upper bound defined by 'AVSpeechUtteranceMinimumSpeechRate' and 'AVSpeechUtteranceMaximumSpeechRate'. So we'll have to set our rate slider to those min and max values:
self.rateSlider.minimumValue = AVSpeechUtteranceMinimumSpeechRate
self.rateSlider.maximumValue = AVSpeechUtteranceMaximumSpeechRate
self.rateSlider.value = AVSpeechUtteranceDefaultSpeechRate
The slider actions are pretty simple, they only update the local variables:
@IBAction func onPitchChanged(_ sender: UISlider) {
    self.pitch = sender.value
}

@IBAction func onRateChanged(_ sender: UISlider) {
    self.rate = sender.value
}

@IBAction func onVolumeChanged(_ sender: UISlider) {
    self.volume = sender.value
}
At the top of the interface we have a 'Read' button. We want this button to be disabled while the synthesizer is speaking. We can easily do this in the delegate callbacks:
extension DetailsViewController: AVSpeechSynthesizerDelegate {
    func speechSynthesizer(_ synthesizer: AVSpeechSynthesizer, didStart utterance: AVSpeechUtterance) {
        self.readButton.isEnabled = false
    }

    func speechSynthesizer(_ synthesizer: AVSpeechSynthesizer, didFinish utterance: AVSpeechUtterance) {
        self.readButton.isEnabled = true
    }
}
When our view is loaded we'll have the synthesizer read out the title of the movie. And the code couldn't be simpler:
let utterance = AVSpeechUtterance(string: self.titleLabel.text ?? "")
self.speechSynthesizer.speak(utterance)
All you have to do is initialise the 'AVSpeechUtterance' with the string and that's it. We could have used an if-let here, but for the sake of clarity we didn't :)
If you wish to control the pitch, rate and volume, you can certainly do so. You can see that in our next example:
@IBAction func read() {
    let utterance = self.getUtterance(self.detailsLabel.text ?? "")

    self.speechSynthesizer.speak(utterance)
}

private func getUtterance(_ text: String) -> AVSpeechUtterance {
    let utterance = AVSpeechUtterance(string: text)
    utterance.pitchMultiplier = self.pitch
    utterance.rate = self.rate
    utterance.volume = self.volume

    return utterance
}
Now, when you run the app and select a movie from the list, you should hear the title being spoken to you. Try and press the 'Read' button and see what happens (turn up your speakers):
You have your app speaking to you with just a few lines of code. Pretty cool, isn't it :)