 App Thinning is one of those things that has been around for a while but a lot of people don’t really know or care about it. If you’re starting a project from scratch most of these things will be enabled by default. If you’re working on an older project there’s a few things that you’ll need to do in order to reduce your app size with app thinning.
App Thinning
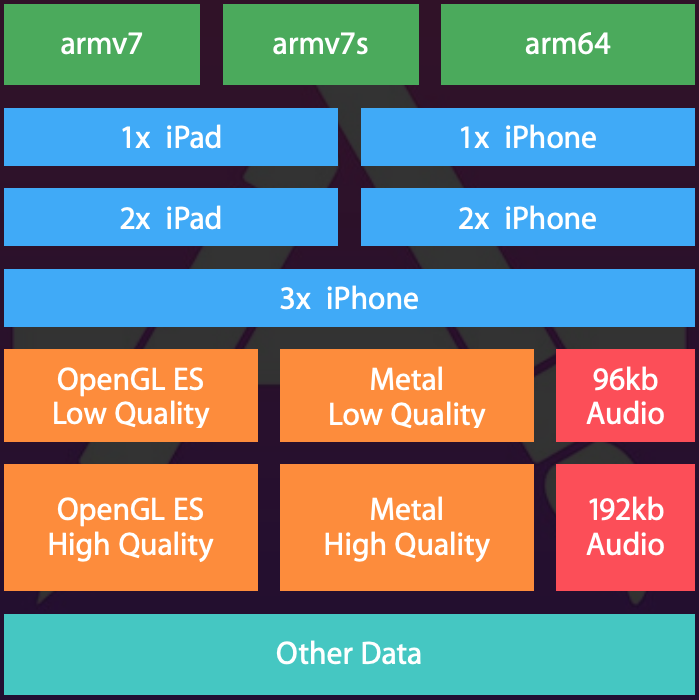
As the name suggests, app thinning is the process of slimming down you app. There are many different iOS devices, many different processors, screen sizes, resolutions. Before app thinning, when we built an app, we built a universal app. Meaning, our universal app could run on an iPad and on an iPhone. So, if you built an app that supports iPhone and iPad and you run it on an iPad mini, you would get all the image assets for all supported resolutions as well as a big binary that’s built for all supported architectures.
It makes more sense to download your executable that’s compiled for the architecture that you’ll be running it on and to download the assets only for the device that the app is going to execute on. There’s no point in downloading assets for iPhone if you’re running your app on iPad, you simply won’t use it.
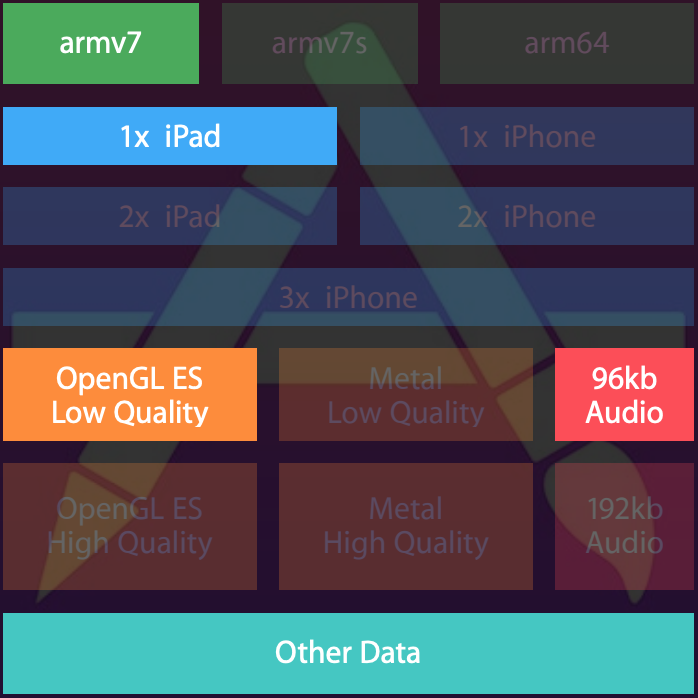
For example, on an iPad mini (1st gen) you’ll only need this:
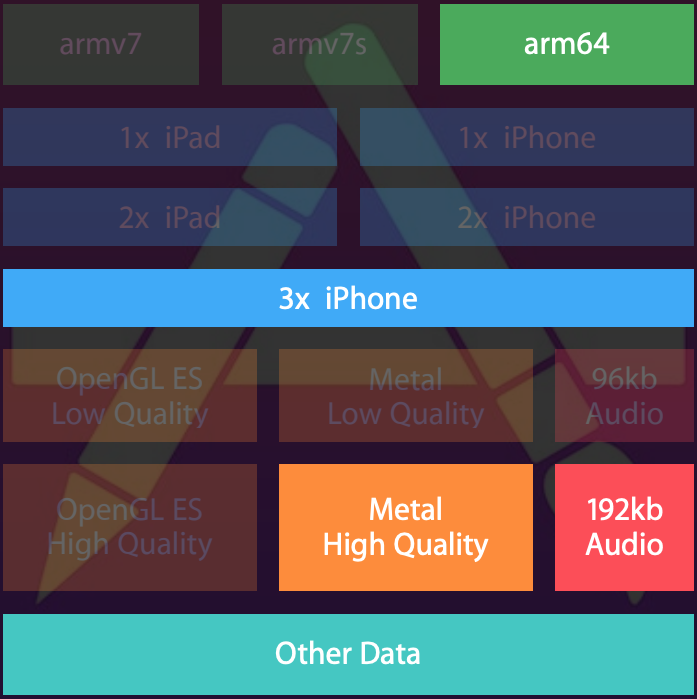
While on an iPhone 6 plus you’ll need this:
This brings us to the essence of app thinning. Slicing up your app so it’s optimized for the device it’s going to be running on. This will decrease the size of the app quite a bit and decrease the download time. It’s also a way to keep your app under the OTA size limit.
All of this slicing is going to happen behind the scenes on the App Store, which is great. If you’re starting a project from scratch, there’s not much you have to do to make this process work apart from using the asset catalogs for your assets. If you’re working on an older project you might want to check a few things. Mainly, enable bitcode and switch to asset catalogs.
Bitcode
For App Store to be able to build different versions of your app you need to enable bitcode. Go to build setting of your target and make sure it’s enabled:

Now when you submit your app for review, it will be compiled into an intermediary language and not a machine language. This is similar to how Java and C# work. When your app gets approved it will be recompiled from bitcode to machine language for every supported architecture. So your one executable can actually produce several smaller executables. When your user installs the app, they will get one of these smaller executables. All this is going to happen behind the scenes and the only thing your or your users will notice is a smaller size of your app.
Asset Catalogs
In order for App Store to slice up your images and resources, you need to be using the asset catalogs. That’s pretty self explanatory 🙂 Otherwise, it would be hard for App Store to know which images are for which device.
Bitcode and asset catalogs is what most of us will be using, and it’s enough to cut your app size down significantly. But there’s one more thing you can do…
On Demand Resources
On demand resources are resources that are hosted on the App Store and your app downloads them when they’re needed. You add your resources to your asset catalogs and you tag them. Then you prefetch them from code. This is a larger topic that we’ll talk about in one of the later articles. If you’re interested in it, you can learn more in the official docs.
Conclusion
App thinning is just something that makes sense and it’s working automagically behind the scenes. If you’re using asset catalogs and have bitcode enabled, you’re pretty much all set. You could further optimize your app size by using the on demand resources if you want.
Having smaller apps is always a good thing. Users don’t waste space on their devices, the apps download faster and poor Apple doesn’t have to pay as much for networking traffic 🙂
I hope you’ve learned something new today and that you had some fun. There’s a great WWDC video on app thinning, check it out if you want to learn more about it.
Have a nice day 🙂
~D;


