 It’s important for our users to have strong passwords. But, strong passwords are usually tedious to type in and often frustrate the users, not to mention that they’re hard to remember. In this article we will be generating strong passwords with AutoFill and store them in the keychain so they can easily be used when logging in. So, let’s get started.
Project Setup
There’s almost no coding involved in making this work, we’ll do everything from a storyboard. But, we’ll have to do a couple of things first in order to make it work. You’re going to need a real device and a developer account. You’ll also need a https server to configure the associated domain.
Associated Domain
You need to associate your app with a domain that you own. This will be used to store data in the system keychain. It’s a two-step process. First you need to enable the associated domains in your project capabilities tab:

Make sure you change the ‘example.com’ to the domain that you actually own. Leave the first part as it is. If all went well, you should see the two checkmarks at the bottom.
Next, you need to get your team identifier and the bundle ID. You can get the team ID from the apple developer portal and you know where to find the bundle ID. We’re going to use this to construct a small JSON file:
Obviously, replace the teamID and bundleID with your own. Save this file to your mac, for now, and give it a name ‘apple-app-site-association’. Don’t add a file extension to the file. Now you need to upload this file to your server. In the root directory on your server, create a directory named ‘.well-known’ (maybe it’s already created). And simply copy this file to that directory. You could copy the file to the root directory, but the recommended approach is to have the file in the ‘.well-known’ directory.
Now we can start working on the app.
The App
Our demo app will be pretty trivial. It will have a standard login screen and a sign up screen. The only thing we need to do is check that the content type property on the text fields is set correctly. For our email/username field the type should be ‘Username’:
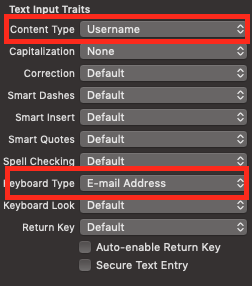
And we’ve set the keyboard type to email, just for convenience. For the password field we’ll set the type to ‘Password’ and we’ll select ‘Secure Text Entry’:
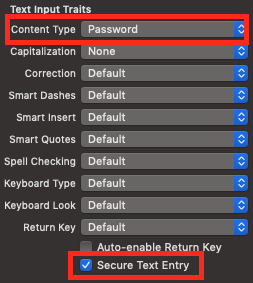
The sign up form will be very similar, except that the password content type should be ‘New Password’:
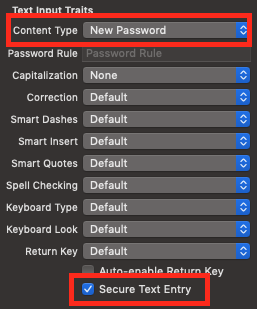
One little detail to note. In order for iOS to save the newly generated password you need to dismiss the sign up view controller. To be precise, it can’t be in your view hierarchy. In your normal sign up flow you would probably call a web service to sign up the user and wait for a callback. If you get an error from your backend and the sign up fails, you can simply nil out the username/password fields before dismissing the view controller. This way no data will be saved. In our simple example we’ll just dismiss the view controller when the user taps the button.
Test It
Before testing the app, make sure you have the iCloud keychain sync turned on and enable the AutoFill passwords in the settings app:
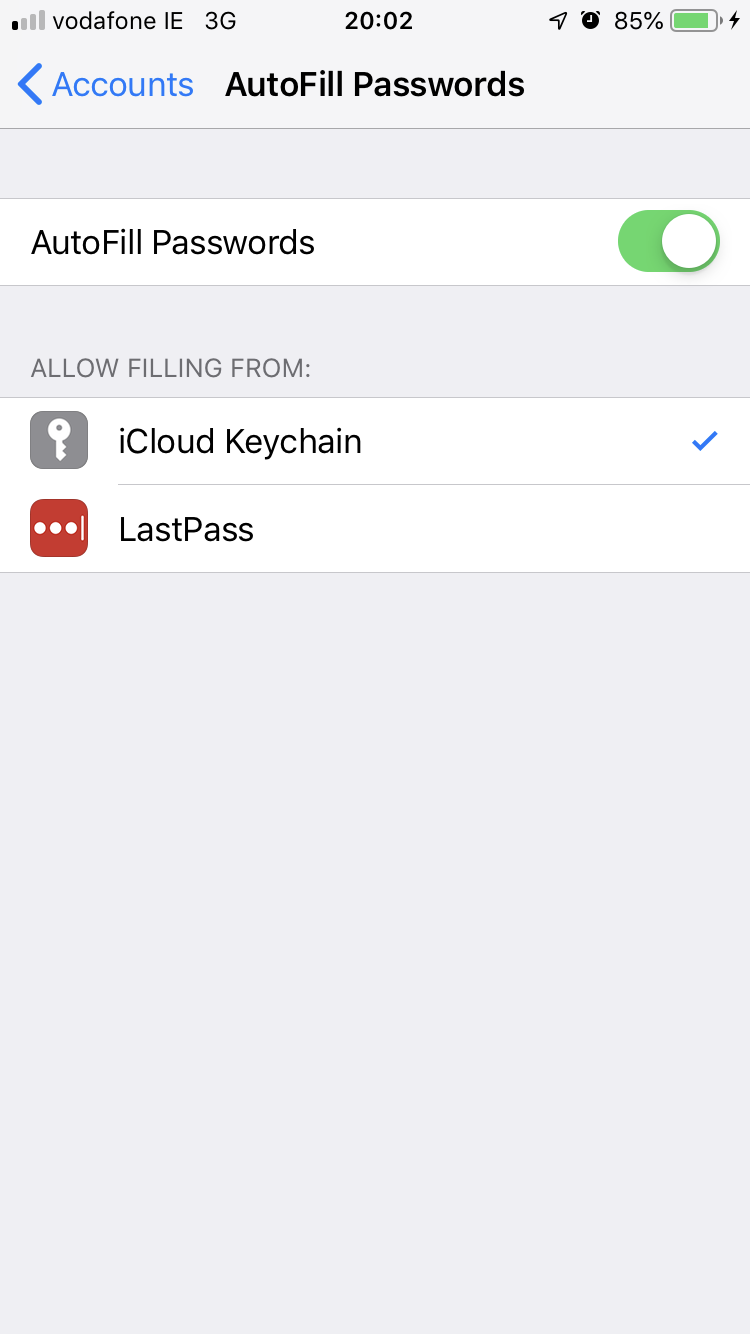
Obviously, select the iCloud Keychain from the list 🙂
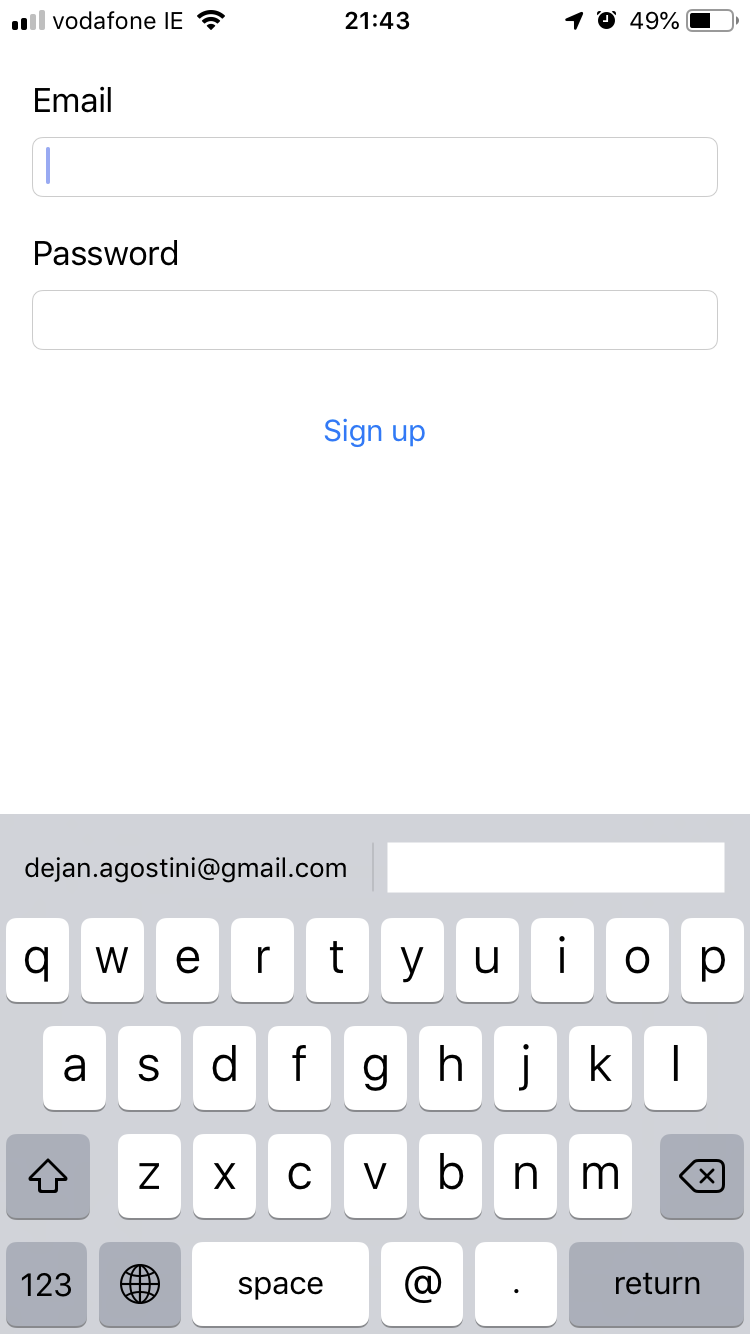
Now, let’s build and run the app and go to our sign up view controller. As soon as we tap into the Email text field we should see the suggested emails:
If we select the suggested email from the list, the password field will get pre-populated with a strong password:
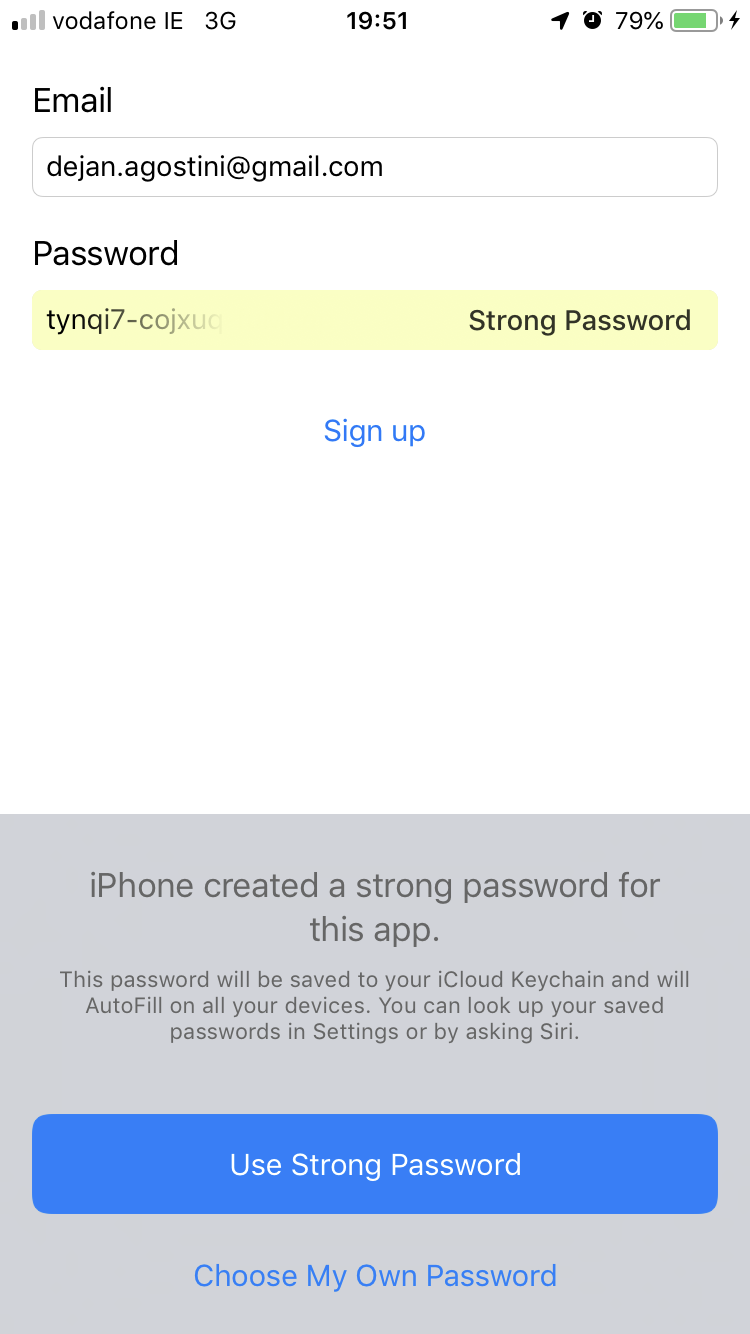
Your user will have the option of using the suggested password or creating their own. When you dismiss this modal view controller, the password will be saved in the keychain. We can test this by going to the login screen and selecting the Email field. We should see our suggested credentials:
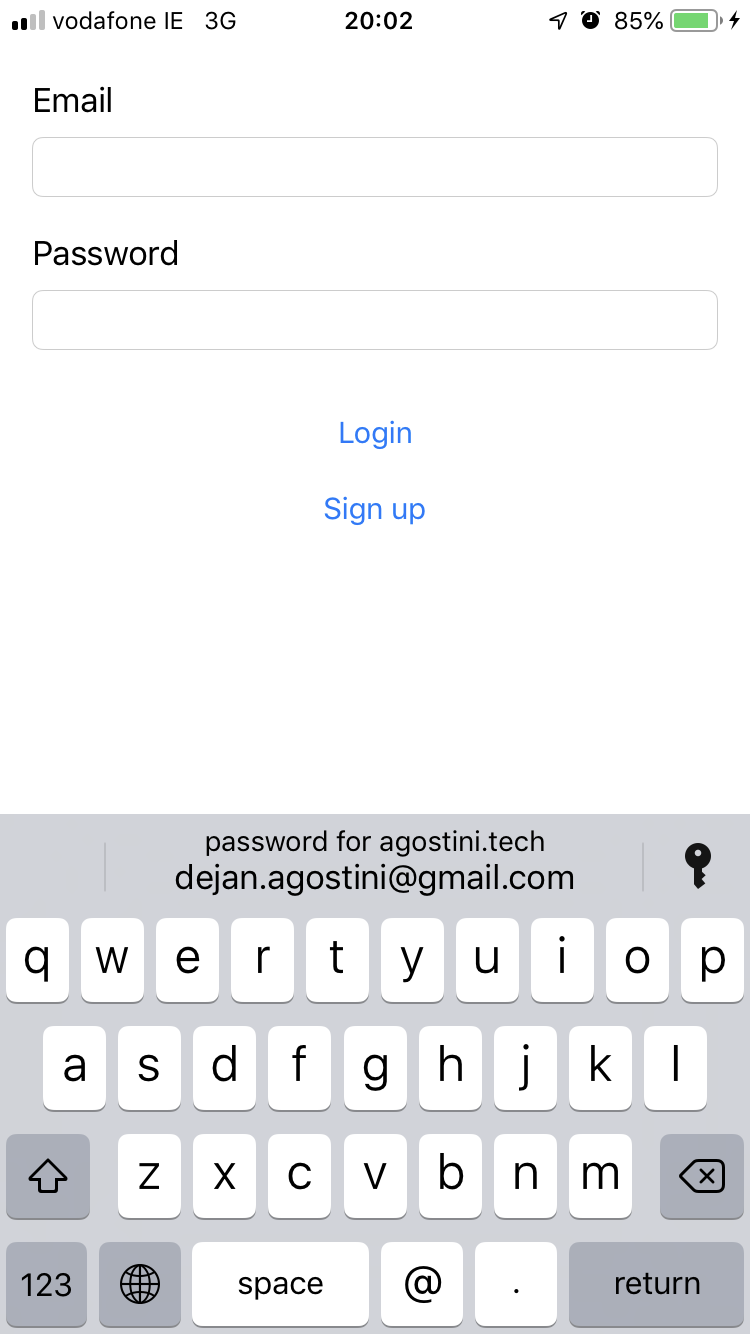
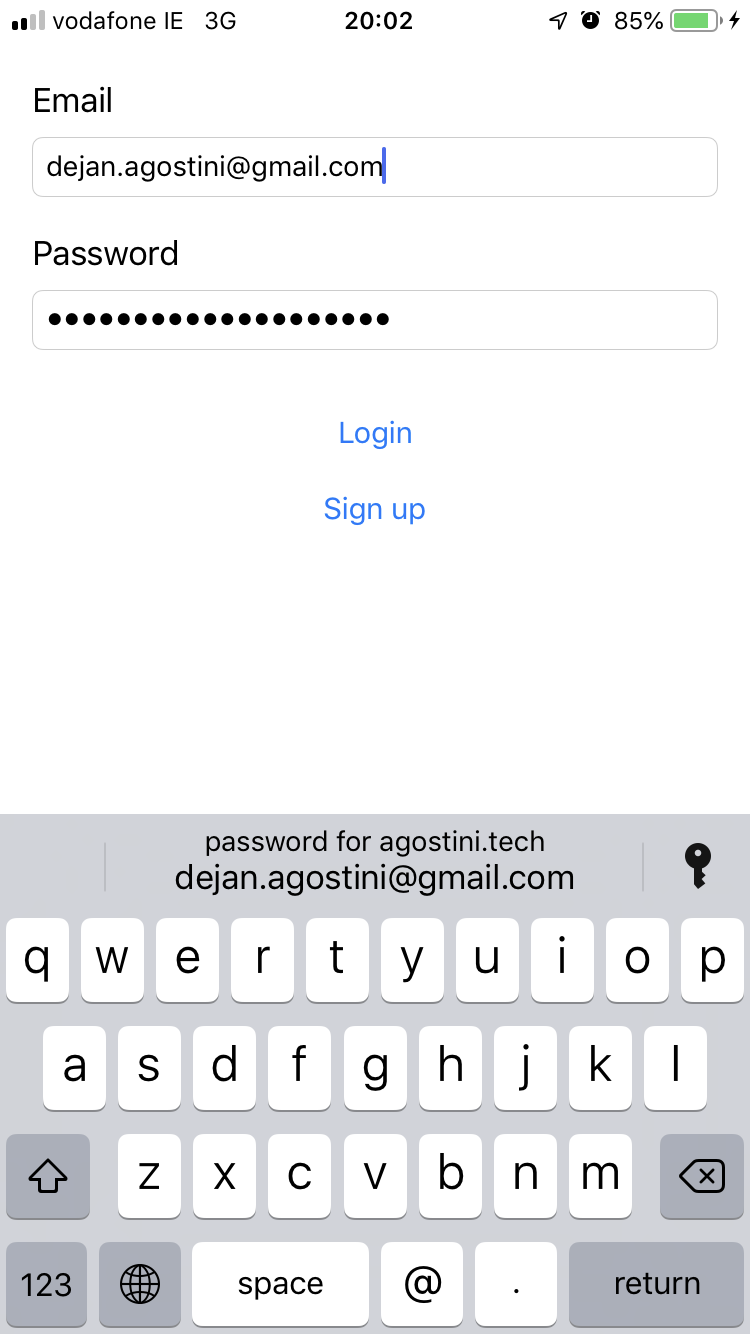
You might be asked to verify the action with TouchID/FaceID, after which you will have your fields pre-populated:
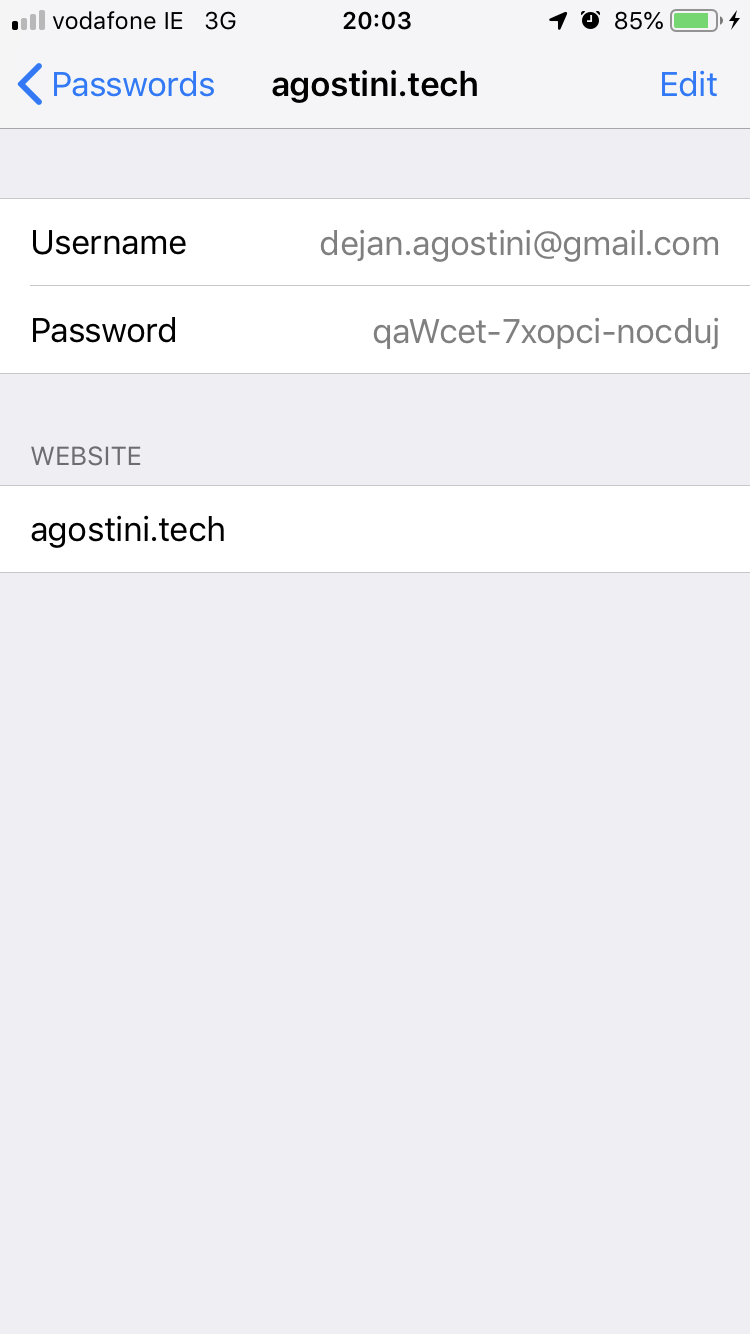
And there we have it… Hassle free passwords 🙂 You can go to the settings and check out ‘Website & App Passwords’ section. You should see your stored credentials there:
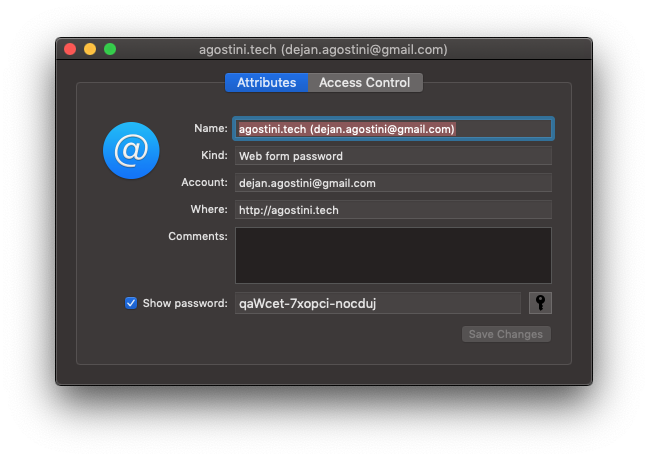
You’ll also see the stored credentials in your mac keychain:
Conclusion
Generating strong passwords is pretty easy to implement on iOS and the AutoFill makes login a breeze. The benefit from this is two-fold, your users are saved from the hassle of thinking of and typing in a password, and your system is a bit more secure because it’ll be harder to break into your users’ accounts.
This was a short article and, hopefully, a useful one 🙂 I hope you’ve learned something new today. If you want to learn more about it, check out this great WWDC video. As usual…
Have a nice day 🙂
~D;
